
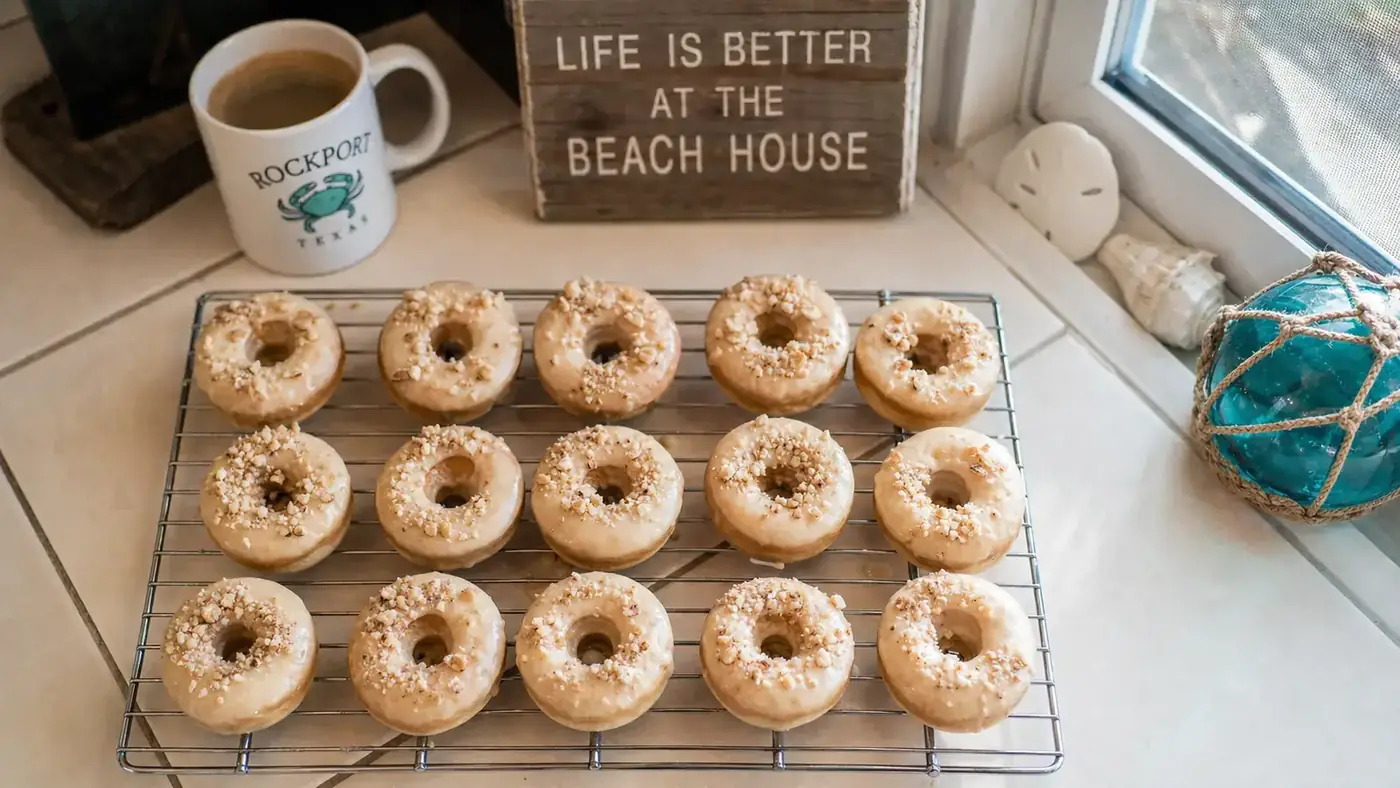
Every other Saturday, our four grandkids pile into the kitchen around eight in the morning, still in their pajamas, asking if we've got donuts. For years my answer was either a twenty-minute drive into town for a box of Shipley's, or telling them no and dealing with the disappointment on four little faces at once. My wife Carol and I don't love the idea of a vat of hot oil on the counter with little ones underfoot either, and her thumb arthritis makes wrestling a heavy stand mixer or a deep-fry basket more trouble than it's worth some mornings.
What changed things for us was realizing you don't need a fryer or a bakery to get that same soft, golden, slightly crisp-edged mini donut the kids go crazy for. You need the right tool and a routine that takes about fifteen minutes from batter to glaze. Below is exactly how I do it now, start to finish, using the Dash Express Mini Donut Maker we keep on the counter here in our little corner of coastal Texas. It's not the only way to make a good donut, but it's the way that actually gets used in our house every other week instead of once a year in some drawer.
Skip the drive-thru line and make the donuts yourself in under 15 minutes
The Dash Express Mini Donut Maker heats both sides at once, makes 7 mini donuts per batch, and cleans up with a damp cloth. No oil, no fryer basket, no mess for little hands to get into.
Amazon Check Today's Price on Amazon →Step 1: Pick Your Batter (Box Mix or From Scratch)
The first Saturday I tried this, I overthought it and pulled out a scratch recipe with buttermilk, nutmeg, and three bowls to dirty. It came out fine, but it took forty minutes and Carol was already tired of hearing the mixer by the time the grandkids got up. These days I keep it simple: a boxed vanilla or spice cake mix, one egg, a third cup of oil, and whatever milk is in the fridge, whisked together until smooth. That's it. If you want a true cake-donut texture from scratch, a basic mix of flour, sugar, baking powder, buttermilk, egg, melted butter, and a little cinnamon works well too, just don't overmix it or the donuts turn dense and rubbery instead of light.
Either way, the batter should be thick enough to hold a ribbon shape when it drips off a spoon, not runny like pancake batter. If it's too thin, the donuts spread past the raised ring in the mold and you lose that classic donut shape. I keep a spare cake mix box in the pantry specifically for donut mornings now, because running out mid-Saturday with six kids and grandkids in the kitchen is not a fun scramble.
One thing I've learned is to mix the batter the night before if I know the grandkids are coming, and just cover the bowl and set it in the fridge. It saves a step in the morning, and honestly the batter holds up fine overnight. Just let it sit on the counter for ten minutes before you start piping so it's not ice cold when it hits the hot plates, which can make the first batch cook unevenly.
Step 2: Preheat the Maker and Grease the Plates Right
Plug in the Dash Express Mini Donut Maker and give it a good five minutes before you pour anything in. I learned this the hard way the first time, pouring batter into a cold machine and ending up with pale, gummy donuts on one side. The indicator light on ours clicks off, or changes color depending on which version you get, once it's actually hot enough to go.
Even though the plates are non-stick, I still brush a light coat of melted butter or a neutral spray oil into each well before the very first batch of the morning. After that, most batches release clean on their own, but that first one always seems to need a little help. Carol's thumb doesn't love squeezing an aerosol can, so we keep a small silicone basting brush next to the machine instead, dipped in melted butter. It takes ten extra seconds and saves you from donuts that tear apart when you try to lift them out.
Where you set the machine matters more than people think too. We keep ours on a folded dish towel on the counter, away from the edge, since it does put out some heat and steam while it's running and four grandkids reaching for donuts around a hot appliance is not a combination I want to leave to chance.

Step 3: Fill Each Well Without Overflowing
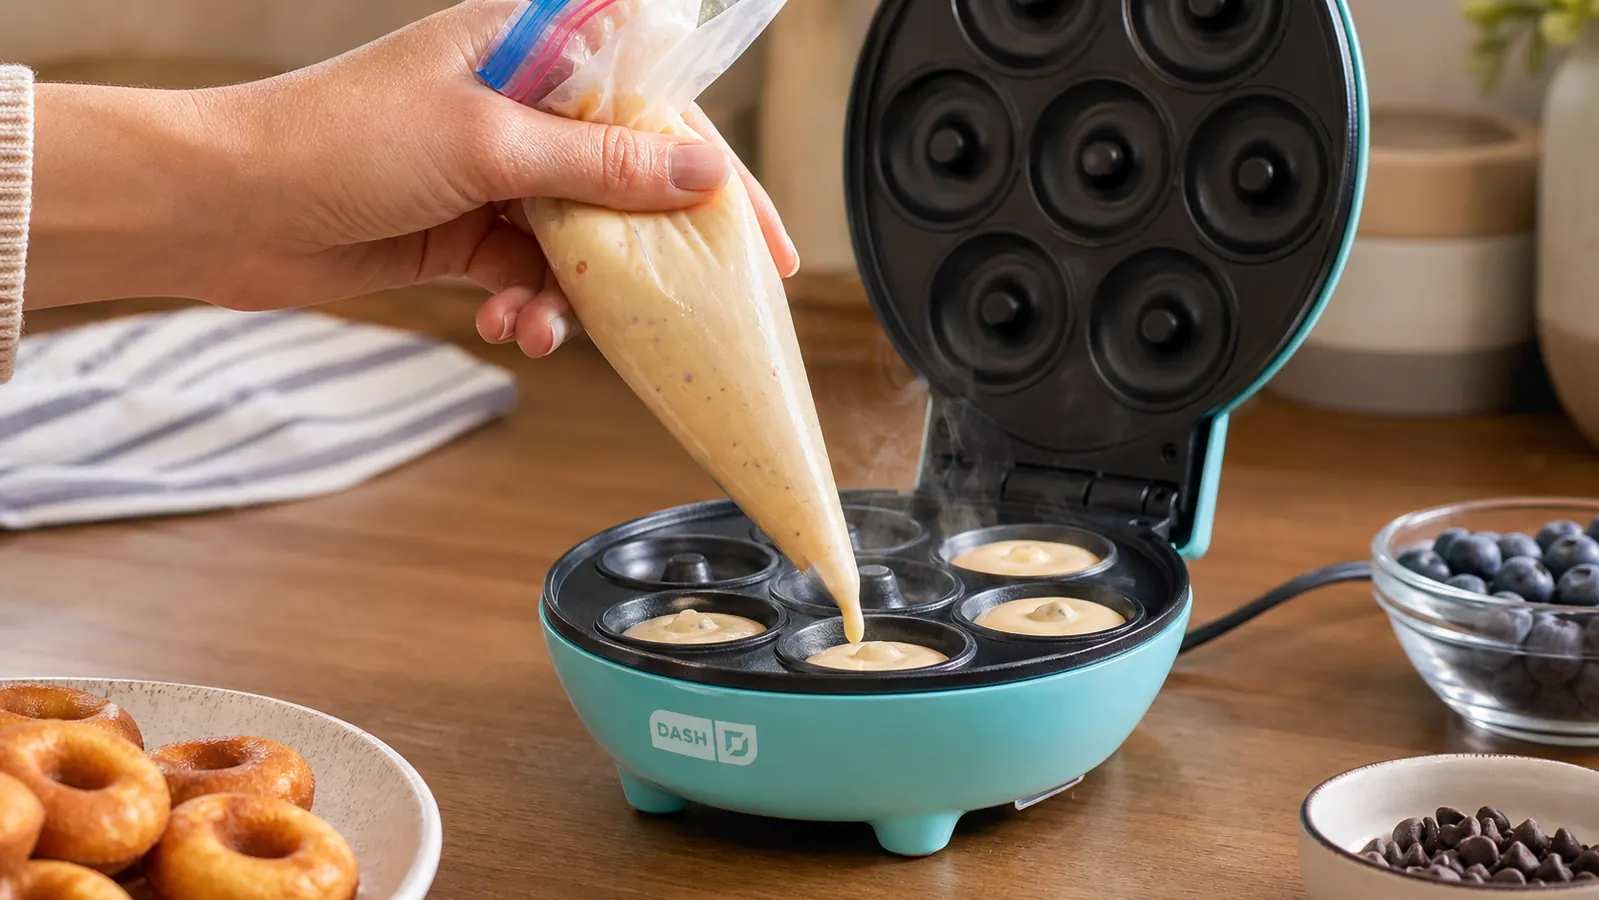
This is the step that trips up most first-timers, myself included. A regular spoon makes a mess, dripping batter over the ridges between wells and onto the raised center post that gives the donut its hole. What works instead is a piping bag, or honestly just a gallon zip-top bag with one corner snipped off. Fill the bag, twist the top, and pipe a ring of batter around each post, filling the well about two-thirds full.
Two-thirds is the number to remember. The batter puffs as it cooks, and if you fill a well all the way to the top it overflows onto the plate and bakes into a thin, papery skirt around your donut that you'll just have to trim off anyway. I fill all seven wells, close the lid, and only then start timing. My grandson Danny's oldest, who's ten now, likes to be in charge of the piping bag, and honestly he's gotten better at even fills than I am.
If a little batter does escape onto the plate between wells, don't panic and don't try to clean it mid-batch. Let it finish cooking, then peel the thin overflow off once everything's out and cooled a bit. Trying to wipe a hot plate mid-run is how you end up with a burned knuckle, and I speak from a little experience there.
Step 4: Time It and Watch for the Real Doneness Signs
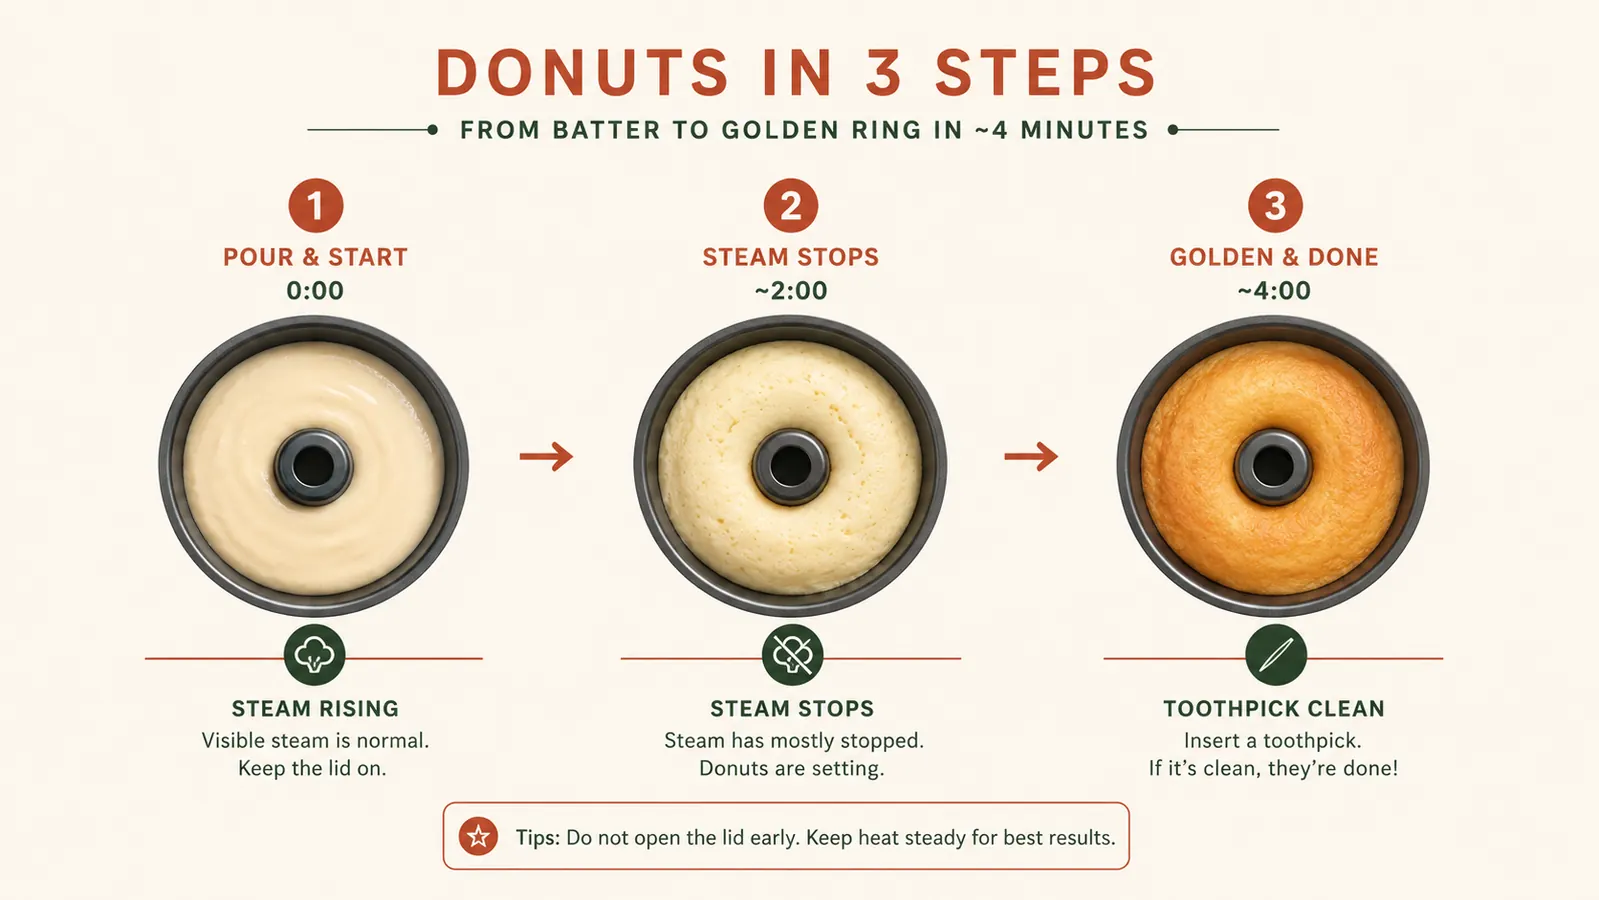
Most mini donut makers land somewhere around four minutes per batch, but I don't set a timer and walk away anymore. Steam is your best clue. When you first close the lid, steam pushes out from the seam pretty steadily. As the donuts finish cooking, that steam slows down and mostly stops. That's usually a better signal than a fixed clock, especially since batter thickness and kitchen temperature both shift the actual cook time a little from batch to batch.
If you're not sure, lift the lid at the four-minute mark and press a finger lightly on top of one donut. It should spring back rather than leaving a dent. A toothpick inserted into the thickest part should come out clean, same test you'd use for a regular cake. Pull them a touch early and the centers stay gummy. Leave them a minute too long and they dry out and get tough at the edges, so this is not a step to rush through while you're also pouring coffee and answering four kids' questions at once.
Chocolate batters tend to look done a little sooner than vanilla or spice batters because the darker color hides underbaking, so I add an extra thirty seconds when we do a chocolate batch just to be safe. It's a small thing, but it's saved us a few gummy centers over the months.
Step 5: Glaze, Dust, or Decorate Like a Bakery Counter
Let the donuts sit on a wire cooling rack for about five minutes before you glaze anything. Dunk them warm and the glaze slides right off in a puddle, which nobody wants after all that work. Our go-to glaze is simple: two cups powdered sugar whisked with three or four tablespoons of milk and a half teaspoon of vanilla, until it's thin enough to dip a donut into but thick enough to set up in a few minutes.
For the grandkids, we set out little bowls of sprinkles, cinnamon sugar, and mini chocolate chips right after glazing, while it's still tacky enough to hold whatever gets pressed onto it. This is the part they actually fight over, not the eating. Megan's youngest likes chocolate glaze with crushed graham cracker on top, which sounds odd until you try it. However you dress them up, this is the step that makes a homemade mini donut look like it came from an actual bakery case instead of somebody's kitchen counter.
If you want a change of pace, a plain cinnamon sugar coating on a donut still warm from the maker skips the glaze entirely and takes about ten seconds per donut, just melted butter brushed on and a roll through cinnamon sugar in a shallow bowl. It's the one Carol prefers, since standing over a mixing bowl of glaze isn't easy on her hands some mornings.
What Else Helps
A wire cooling rack over a sheet pan makes cleanup and glazing a lot less sticky, since drips fall onto the pan instead of your counter. I also keep a stack of small paper bakery bags on hand, the kind with the little waxed window, because sending grandkids home with a bag of six donuts is an easy way to end a visit on a good note. If you're batch-cooking for a bigger group, mix a double batch of batter up front and keep the extra covered on the counter between rounds, since the maker only turns out seven at a time and a full house of grandkids goes through them fast.
Cleanup is mostly a damp cloth once the plates cool a little. I don't recommend submerging the base in water, just wipe the plates and let them air dry before you put it away. We store ours in a lower cabinet standing on its side, which keeps it out from underfoot but still close enough that I'm not digging through the whole kitchen every other Saturday morning to find it.
One last thing worth mentioning: leftovers freeze better than you'd expect. If we somehow end up with extra donuts, plain or glazed, I lay them out on a sheet pan in the freezer for an hour, then bag them up once they're solid. A quick fifteen seconds in the microwave brings a frozen one right back to soft, and it beats letting a batch go stale on the counter before the next Saturday rolls around.
The kids don't remember the donut shop. They remember standing at the counter with sprinkles on their hands, waiting for the next batch to come out warm.
Ready to skip the bakery run for good?
The Dash Express Mini Donut Maker is what makes this whole Saturday routine possible in our house, no fryer, no oil splatter, and it's easy enough that even a ten-year-old can help run it under supervision. Check today's price and see if it fits your kitchen too.
Amazon Check Today's Price on Amazon →